
Products
View All


Easily customise your space with Shelly’s compact switches and dimmers. Automate lighting, appliances, and climate, or create personalised scenes for your daily routine.
Effortlessly control your space with Shelly’s smart switches and dimmers. Automate lighting, appliances, and climate, or create custom scenes for your routine.
Shelly’s automation solutions adapt to your routine to minimise energy usage and optimise efficiency. With built-in power metering, you gain control over consumption, enabling automated device management for optimal energy efficiency.
Shelly Plug and Play range provides instant smart functionality to your devices. With an intuitive portfolio from smart plugs to motion sensors, you can effortlessly transform any space into an automated environment.
Shelly’s light, motion, and leak sensors provide reliable monitoring, keeping you informed of unexpected events for enhanced safety and peace of mind.
WiFi Operated
What truly sets Shelly apart is the fact it’s controlled over Wi-Fi, eliminating the need for expensive hubs or complex protocols.
Compact Size
Reputed for its tiny retrofit range, Shelly products fit discreetly behind switch boxes or sockets, ensuring integration without compromising functionality.
Rapid Installation
With a new device installed every 6.5 seconds, Shelly offers lightning-fast installation and user-friendly design for swift deployment.
Highly Secure
Renowned for robust encryption and privacy measures, Shelly ensures data protection with end-to-end encryption, minimising the risk of interception and unauthorised access.
200+ Integrations
Integrations with 200+ partners, including Amazon Alexa, Google Home, and SmartThings, are supported by MQTT, WebHooks, scripting, and a comprehensive management app.
Energy Efficient
With built-in power metering, you gain precise control over consumption, allowing for automated device management tailored to optimise your energy efficiency.
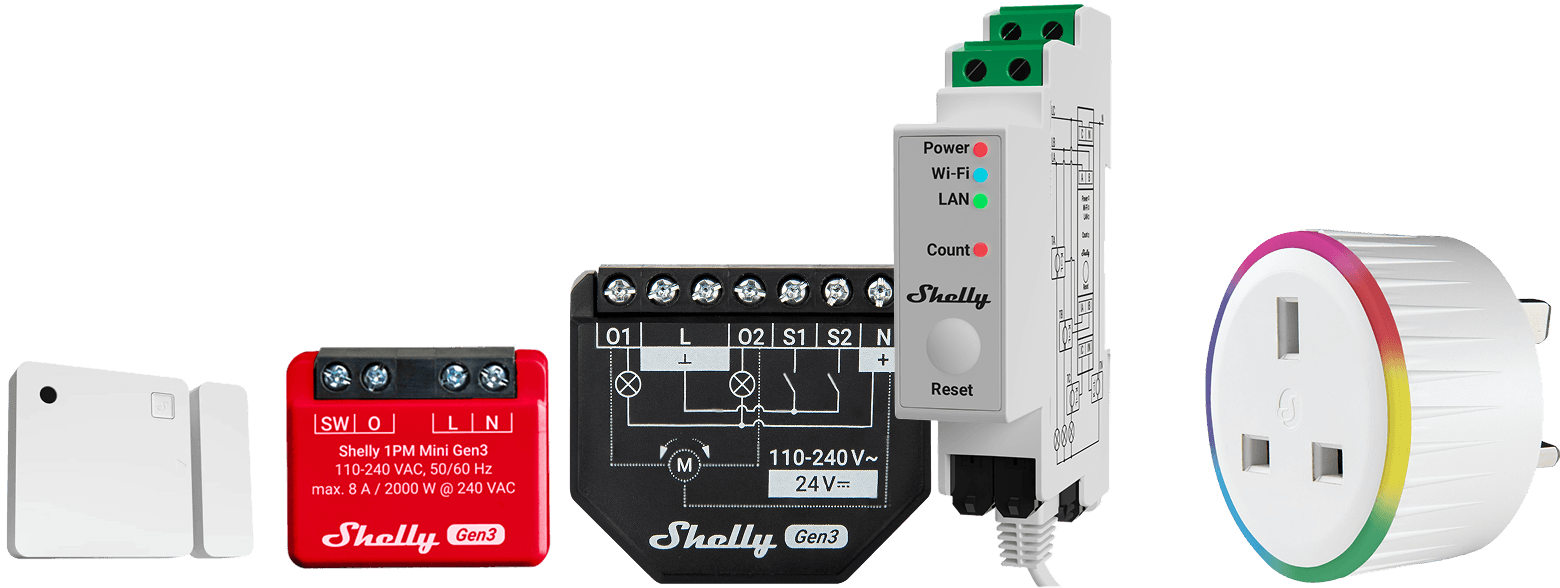
Shelly devices can be easily connected to your WiFi network through the device's built-in web interface.
1. Enter the Shelly's Web Interface
Once your Shelly device is connected to a power source, search on your phone or computer for available WiFi networks. Your Shelly device will have its own WiFi network - find it and connect to it!

Once you're connected to your Shelly device's WiFi network, open a browser window and enter the default IP address in the address bar. The default IP should be 192.168.33.1.
If you'd like to control and monitor your Shelly devices in the Shelly Smart Control app, you have to enable cloud access; click on the Settings cog, go to Cloud and click Enable Cloud.

2. Connect your Shelly device to your WiFi network.
Now that you're in the web interface, it's time to tell your Shelly device which WiFi network to connect to.
Click on the settings cogwheel, select WiFi, and tick 'Enable WiFi Network'. Choose your WiFi network, add the password, and click save.

Your Shelly device will be assigned an IP address once it's connected to the internet - make sure to make a note of it, as it'll make adding and identifying Shelly devices much easier in the long run!

Click here for guidance on how to add a Shelly device to your app, for complete control over your smart home from your phone!
Once you've connected your Shelly device to your WiFi, you can add it to your Shelly smart home app to control it easily from your phone.
Click here for our FAQ on how to connect a Shelly smart device to your WiFi network!
First, make sure your phone is connected to the same WiFi network as the Shelly device - this is so your phone can discover devices on the local network.
Click on the Plus button in the bottom right, or select the 'Discovered' tab at the top of the screen.

Then, click 'Scan WiFi for devices'. All Shelly devices on that particular WiFi network should appear; find the Shelly device you're looking to add, and click 'Add Device'. If it doesn't appear after refreshing, you can click on 'Add by IP' and add the device with its IP address that you noted down earlier.
Finally, give your Shelly device a name and assign it a room, and you're done!
Yes! Shelly devices are fully compatible with Home Assistant, and can be controlled through the Home Assistant interface.
Click here for more detailed steps on how to integrate your Shelly network with Home Assistant.
Yes! While your Shelly devices can be controlled entirely through their native interfaces such as the free mobile and desktop apps or the local browser interface for each device, Shelly is also extremely widely compatible with smart home integrations like Amazon Alexa, Google Home, SmartThings and Home Assistant.
Some integrations like Google Home, Amazon Alexa and Home Assistant even offer basic or advanced programming capability, allowing you to make use of Shelly’s open API to write your own scripts for complete control.
Shop our range of Shelly devices here!
Shelly offers a range of control options for your smart devices: the free Shelly App for Apple and Android, as well as desktop, allowing you to control your Shelly devices from anywhere, and there’s even a cloud interface to access all of your devices: https://home.shelly.cloud.
Shelly offers integrations with 200+ partners, including Amazon Alexa, Google Home and Samsung SmartThings, and has also developed a Wall Display, featuring a 4” touch screen from which you can monitor and control your Shelly network.
Each device also has a local interface that can be accessed without any internet connection, which will appear in your list of WiFi networks, and accessing the local interface of a device is as simple as connecting to its network and typing ‘192.168.33.1’ into the address bar of your browser.
Shop our range of Shelly devices here!