How can I turn my Shelly devices into WiFi Range Extenders?
Every Shelly Plus, Pro and Gen 3 device is equipped with a built-in RJ45 port allowing you to connect an Ethernet cable.
Once this Ethernet cable is connected, you can activate the Shelly device's range extender feature; this means that, in addition to the Shelly's usual functionality, it can also act as a WiFi access point, allowing other Shelly devices to wirelessly connect to the internet where before they may have been out of range.
Here's how you can activate the range extender function once an Ethernet cable is connected.
1. Access the device's interface, either by connecting to the device's own network or through the cloud app, and then go to Network. Click the drop-down menu for Range Extender, and tick 'Enable Range Extender'.

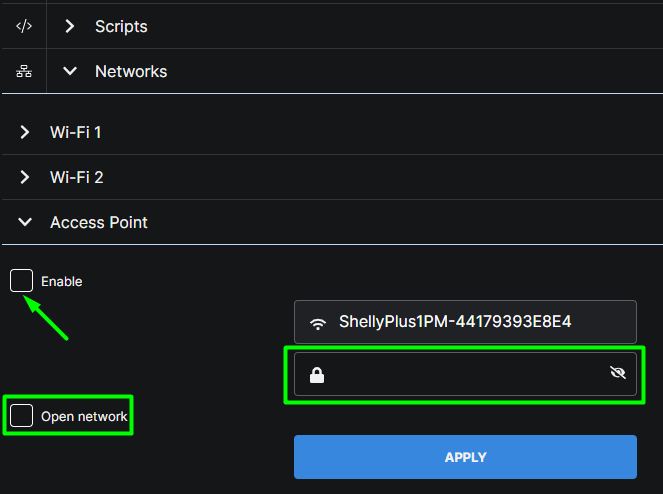
2. Then, open the Access Point drop-down menu. Click 'Enable', and choose for the network to be open or require a password. Once you've chosen, click 'Apply'.
If you'd like to connect your Shelly devices to your newly made access point, here's how you can do so:
1. Go to the WiFi settings of your computer or mobile phone, and connect to the network of the Shelly device that you're connecting to the range extender.
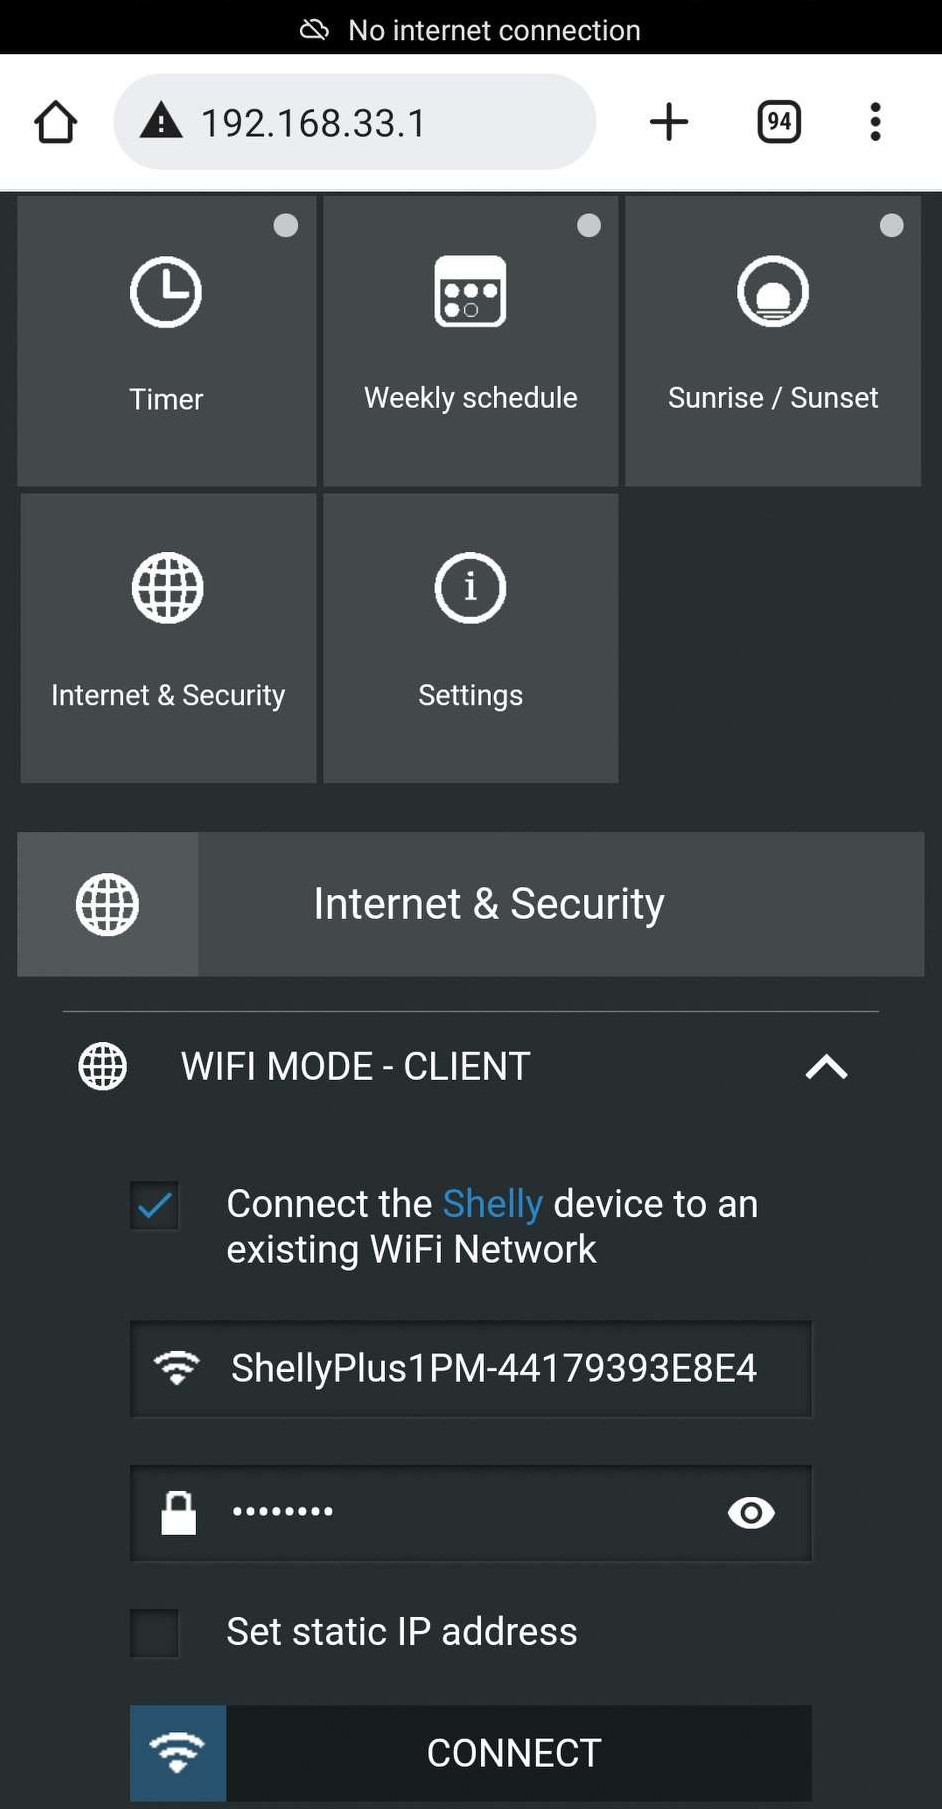
2. Open a web browser and type 192.168.33.1 to access the local interface. Then, go to Internet and Security Settings, and click on Network. Select WiFi Mode - Client, and enter the range extender's AP name and password if you've set one.
3. Open your computer or mobile phone’s WiFi settings again, and this time, connect to the range extender’s network.
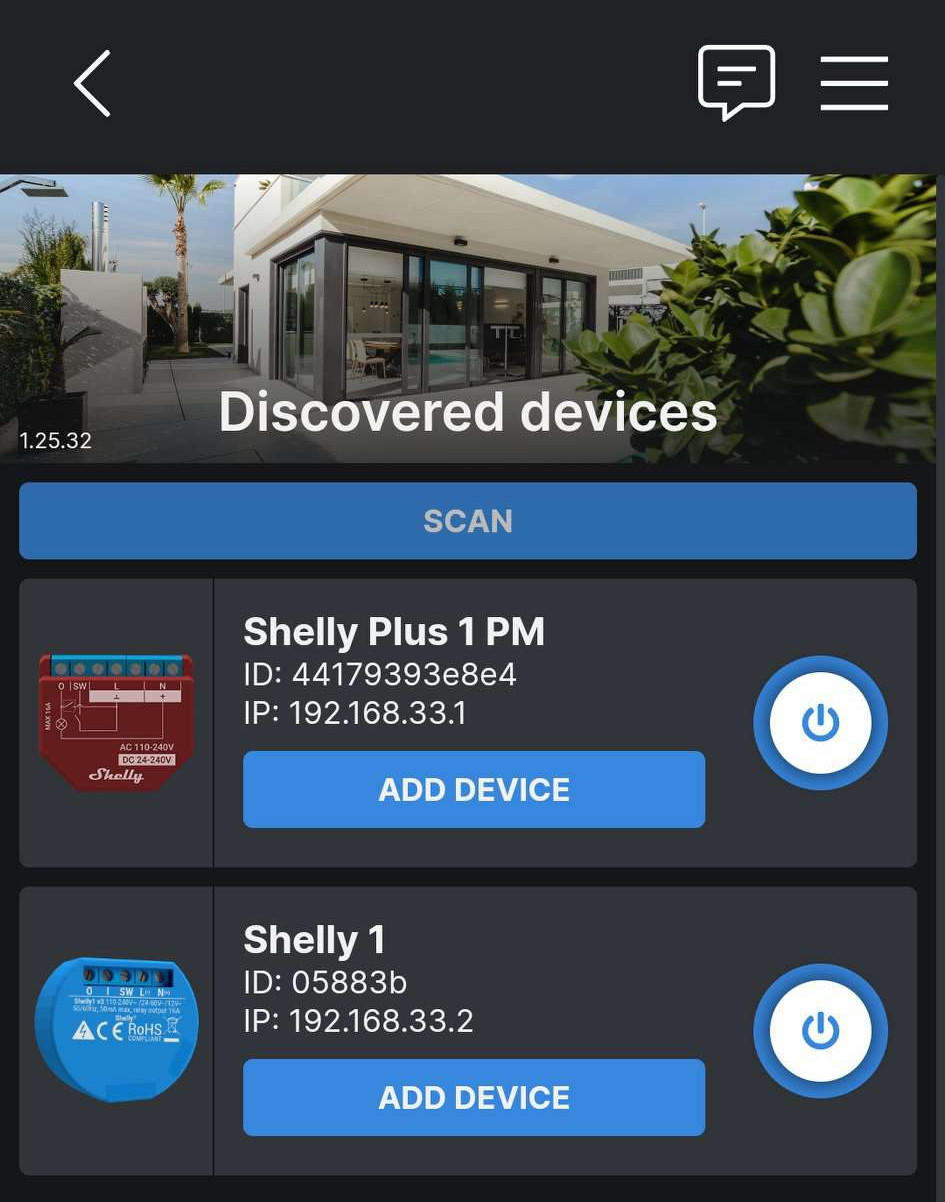
4. Open the Shelly Cloud App and open the menu in the top right, then click Discovered Devices. Click Scan, and the Shelly device you’d like to connect will appear. Just click Add Device to add it to your Shelly account, and the device will connect to the range extender automatically!