Wireless Ceiling Speakers by Lithe Audio
Lithe audio is a relative newcomer to the in-ceiling speaker space, but is fast becoming a favourite among audiophiles and casual-listeners alike. The process of installing ceiling speakers can be intimidating and, with products from most manufacturers, this fear is justified. Lithe Audio, however, are different.
Usually, after you’ve purchased your speakers, a separate amplifier, cables to route power to all of these and then found space for them, you’re looking at a hefty bill. On top of that already hefty bill, you find you’re also looking at a full-scale home or office renovation if you want to get your ceiling speakers and an amplifier installed elegantly.
Thankfully, with Lithe Audio ceiling speakers, these are non-issues thanks to their ease of installation and accessible price point. If you choose Lithe Audio ceiling speakers, installation is as easy as a four-step process, requiring only the simplest of DIY tools to perform and that’s for the following reasons:
Built-In Amplifier
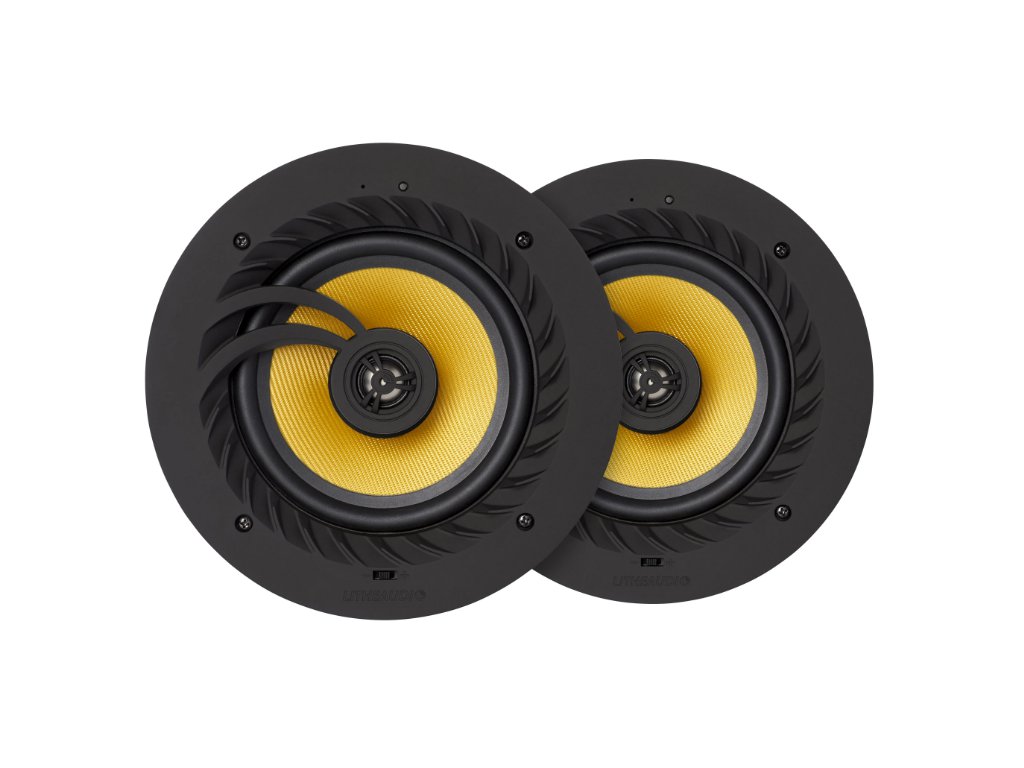
Each speaker has a built-in amplifier, saving you the cost of purchasing a separate amp, as well as solving the problem of where to put it. The kevlar woofer and titanium tweeter are clues as to the premium build quality and attention to detail present throughout each of these carefully designed speakers and, when it comes to powering the speakers, you have multiple options available to you that help reduce costs further.
No Cable Routing Required
Whilst the included power cable can be used to power the speaker normally from an electrical outlet, chances are there won’t be one readily to-hand in the ceiling. Happily, these ceiling speakers can be powered directly from the lighting circuit via a dedicated 3A fused spur. This saves you the hassle of planning cable routing through ceilings or walls for power, instead requiring cabling of only a couple of feet in length. If you’re considering this option, though, we strongly recommend having a qualified electrician do the job for you.
With everything you need built right into the speaker unit itself, if you choose Lithe Audio ceiling speakers, you can install your ceiling speakers in four easy steps with tools you should either already have available, or be able to source almost anywhere.
Installation Prep
Tools You’ll Need
- Cutting template (included)
- Pencil
- Pad saw (also called a jab saw or keyhole saw)
- Tape measure
- Phillips screwdriver
And, if you’re installing directly into the ceiling, you will also need:
- Stud finder
- Goggles or other protective eyewear
- Tape
How To Install a Ceiling Speaker
One: Position your speaker.
- Use a stud finder, if necessary, to ensure your elected position for your new ceiling speaker is suitably free of pipes, cables and other obstructions.
- Use a tape measure to mark out the position of the speaker and to centre the cutting template.
- Use a pencil to trace around the inside of the supplied cutting template.
Two: Create a hole for your speaker.
- Drill a pilot hole directly into the ceiling or use the tip of your pad saw to get started on the cutting. Alternatively, a bradawl will do the job fine too. The density of the material you’ll be cutting will dictate which tool is best for the job.
- Cut out the hole for your ceiling speaker, taking care to avoid cutting yourself. Use protective eyewear.
Three: Power your ceiling speaker.
- Connect the supplied power cable to a 13A mains outlet or strip the power cable and terminate it at a dedicated 3A fused spur.
- Consider having a qualified electrician perform this step for you if powering from the lighting circuit via a fused spur.
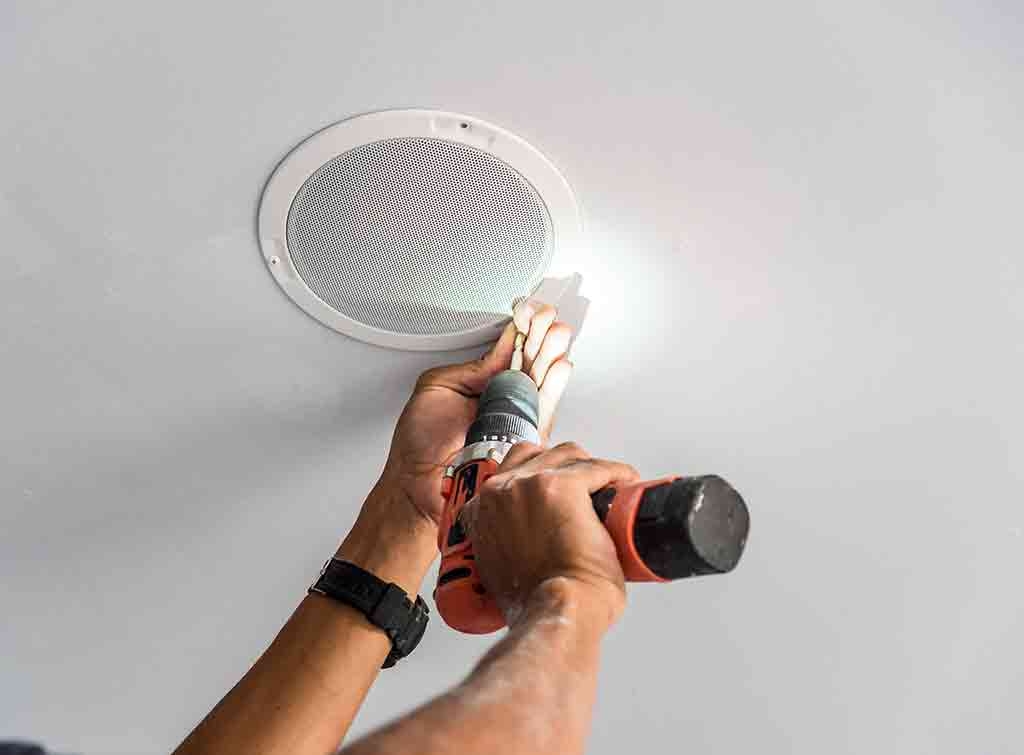
Four: Fit your ceiling speaker.
- Push your ceiling speaker into the hole you’ve created with the speaker facing towards you.
- Holding the speaker firmly in place, use a standard Phillips screwdriver to turn the screws on the face of the speaker.
- This will tighten the dog leg fixings against the ceiling from the other side, securing your speaker in place.
Conclusion
Installing ceiling speakers doesn’t have to be difficult and it doesn’t have to cost you the world. The simple, four-step process outlined above should roughly describe the steps for installation of most ceiling speakers, but four steps can quickly turn into eight or ten or more if you’re not able to easily power your speakers and create a fitting hole with simple, DIY-grade tools.
Therefore, if you’re looking for ceiling speakers that are cost-effective and simple to install, then look no further than Lithe Audio. Their speakers come in both Bluetooth and WiFi varieties, with IP44 rated speakers suitable for humid locations like bathrooms and indoor swimming pools.
The kevlar woofer and titanium tweeter are clues to the premium build quality and attention to detail present throughout each of these carefully designed speakers. Airplay 2 compatibility makes the WiFi speakers as easy to use as Bluetooth units after installation: just connect and play. Due to the advances in Apple’s Airplay technology, with Airplay 2 you’ll be able to treat your Lithe Audio in-ceiling speakers as you would any other Airplay-compatible device. You can have your music playing through your Apple TV, MacBook, HomePod and Lithe Audio ceiling speakers all simultaneously for the ultimate home-party experience.
If you have any further questions, we’d love it if you contact us directly for personalised advice on ceiling speakers or networking hardware.